Terraforming Minecraft: Learning Software Design & DevOps Fundamentals Through Minecraft
At Microsoft Ignite 2025, I showcased an updated version of the Minecraft Terraform Primitives module library — an open-source toolset that brings geometric building blocks to Minecraft using Terraform. This library encapsulates basic 3D shapes, making it easier to construct and connect more complex structures programmatically in a Minecraft world.
You can checkout the Minecraft Terraform provider that I maintain here:
https://registry.terraform.io/providers/markti/minecraft/latest
You can find more information about the Minecraft Primitives Module Library that I built here:
https://registry.terraform.io/modules/markti/primitives/minecraft/latest
Both projects are open source and I am accepting Pull Requests!
In this article, I’ll walk through one of the simplest but most powerful modules in the library: vectors. These primitives are directional lines defined by length, orientation, and material. They offer a compelling way to understand Terraform module inputs and outputs, while giving learners of all ages a creative introduction to infrastructure as code using Minecraft and HashiCorp Configuration Language (HCL).
Introducing the Vector Module
A vector in this context is a line made of Minecraft blocks. It has a starting position, a direction (north, south, east, west, or up), a length, and a material. Let’s look at a basic example: a vertical vector made from five blocks of white wool.
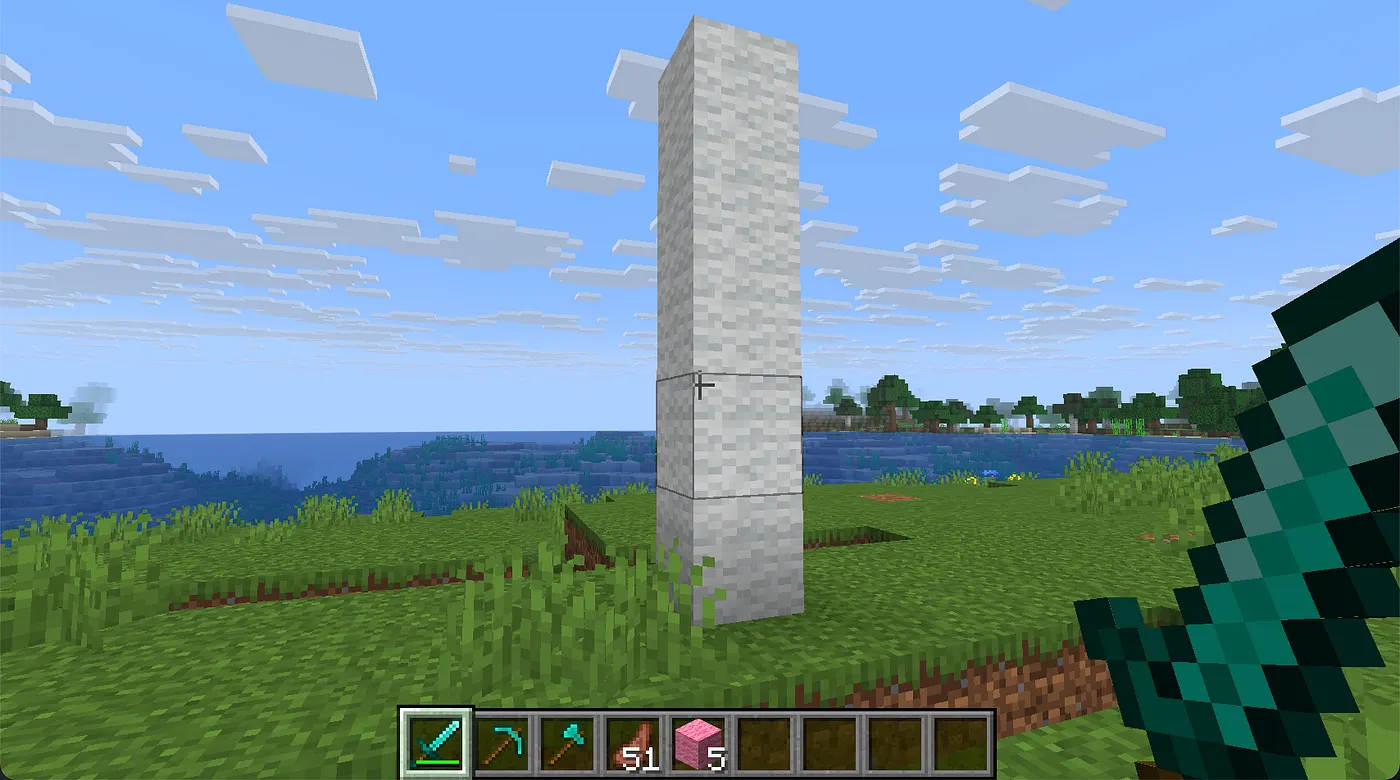
This is what the Terraform code looks like to produce this tower of wool!
module "white" {
  source = "../../modules/vector"

  material  = "minecraft:white_wool"
  length    = 5
  direction = "up"
  start_position = {
    x = 486
    y = 64
    z = 142
  }
}
With a single terraform apply, this configuration spawns a wool tower in the sky.

Change the material value and run it again, and now that same tower could be built from gold blocks, obsidian, or even diamond—an instant visual transformation with minimal code.
Connecting Vectors with end_position
The real power of this vector module emerges with the addition of the end_position output. This tells us the final coordinate of any given vector. With that output, we can chain vectors together to build more sophisticated shapes without manually calculating positions.
Here’s how I attach a new blue wool vector to the end of the white one:
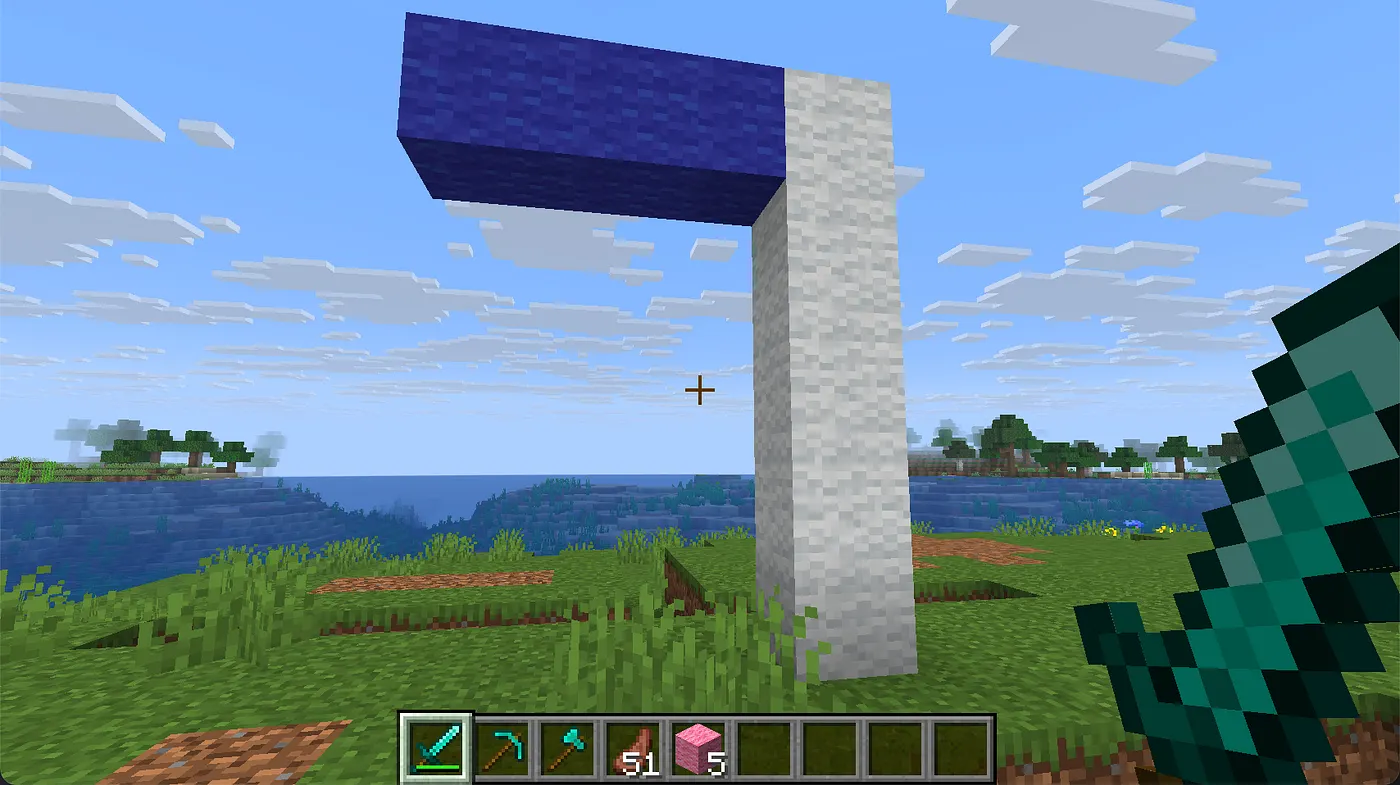
Here I am adding another vector made out of blue_wool and attaching it to the end_position of the white vector.
module "blue" {
  source = "../../modules/vector"

  material       = "minecraft:blue_wool"
  length         = 3
  direction      = "west"
  start_position = module.white.end_position
  transform = {
    x = -1
    y = 0
    z = 0
  }
}
This blue vector can’t start exactly from the end_position of the white wool vector which is referenced as module.white . I need to offset it from that position in a direction that will prevent me from overwriting the white vector. In this case, because I am creating a westbound blue vector, I set the transform input variable to offset it one block to the west of the white vector. This will allow the blue vector to continue mission westward without impacting the white vector.
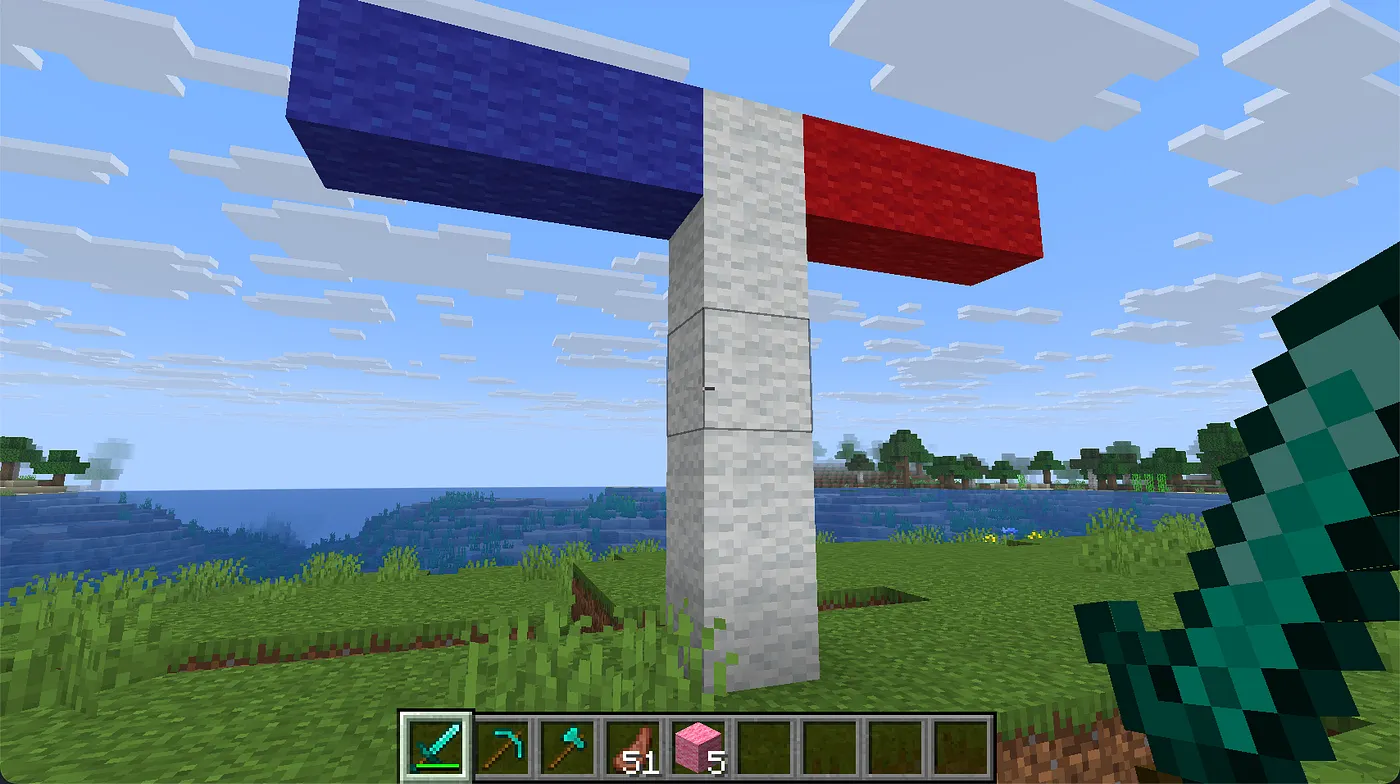
Expanding in Multiple Directions
This same pattern lets us branch out in other directions as well. For example, here’s a red wool vector heading east, also offset to avoid overlap with the white vector: I can do the same in the opposite direction to create a red vector heading eastbound. In this case, I still use the white vector’s end_position but I change the transform to offset the red vector by one block east.
module "red" {
  source = "../../modules/vector"

  material       = "minecraft:red_wool"
  length         = 3
  direction      = "east"
  start_position = module.white.end_position
  transform = {
    x = 1
    y = 0
    z = 0
  }
}
This is what the new structure looks like with both the blue and red vectors attached to the end_position of the white vector:
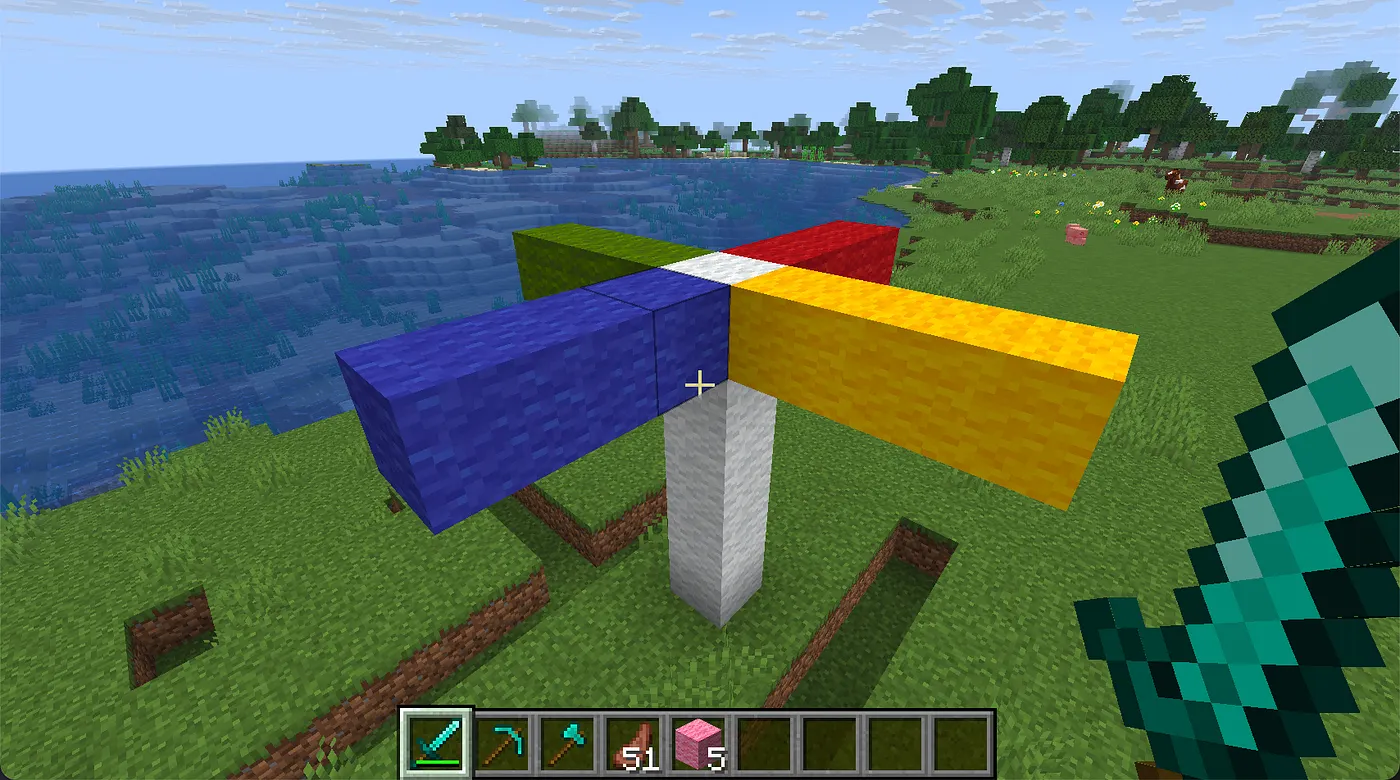
We can do the same along the Z-axis to add vectors heading north and south:
module "green" {
  source = "../../modules/vector"

  material       = "minecraft:green_wool"
  length         = 3
  direction      = "north"
  start_position = module.white.end_position
  transform = {
    x = 0
    y = 0
    z = -1
  }
}

module "yellow" {
  source = "../../modules/vector"

  material       = "minecraft:yellow_wool"
  length         = 3
  direction      = "south"
  start_position = module.white.end_position
  transform = {
    x = 0
    y = 0
    z = 1
  }
}
By coordinating the direction and the transform parameters correctly, we can construct branching shapes, layered scaffolding, or directional patterns—all with only a few lines of Terraform code.
I hope this shows you how you can use the most basic module in the Minecraft Terraform Primitives Module Library and how using the connector outputs of the module and the transform input you can more easily and concisely connect Minecraft resources together in your Minecraft world.
Conclusion
What may look like a simple exercise in block placement is actually a powerful illustration of how Terraform modules work. These vector primitives teach the core mechanics of module design: encapsulation, reuse, input/output management, and composition.
For those new to Terraform or programming, particularly students (young or adult), this library provides a low-barrier, highly visual way to experiment with infrastructure-as-code principles. It leverages the familiar world of Minecraft to teach the logic and structure behind functional configuration languages like HCL.
The vector module is just the beginning. By using outputs like end_position and inputs like transform, we can connect modules into larger, reusable patterns that unlock complex builds with minimal code duplication. Whether you’re an educator, a student, or an infrastructure engineer who loves Minecraft, the Terraform Primitives module library offers a creative and functional entry point into programmatic world-building.
Give it a try, remix it, and see what shapes you can bring to life.